How to build a DIY Meshtastic Node with ESP32 & SX1262
When I first started with Meshtastic I didn't know it was possible to build a DIY node without the Heltec V3 or similiar. They are great boards, however you might have a ESP32 already lying around, want to build another form factor, add multiple own sensors or just cheap out on the components :)
Getting started with Platformio, connecting your own LoRa Radio Module and configuring Sensors can be quite difficult but I will try to get you through everything in this guide.
Step 1 Which MCU
The heart of this Project is the Microcontroller which is why it has to be chosen carefully. In general it comes down to two valid choices, each with its own strengths and disadvantages:
| ESP32 | nRF52840 | |
|---|---|---|
| Energy Efficiency | ❌ High (~80–240 mA active) | ✅ Low (~15 mA active) |
| Battery Life | ❌ Days | ✅ Weeks to Months |
| WiFi | ✅ Yes | ❌ No |
| Meshtastic Web UI | ✅ Yes (via WiFi) | ❌ No |
| Phone Pairing (BLE) | ✅ Yes | ✅ Yes |
| Price | ✅ Cheap (~3–6 €) | ❌ Pricier (~8–15 €) |
| Best for | Stationary / Indoor Nodes | Solar / Battery Nodes |
I use the ESP32 for my indoor base station and the nRF52840 for my solar node.
One important thing to keep in mind: the Meshtastic firmware is quite large, and it runs significantly better on newer ESP32 chip variants. For example, my old LOLIN/WEMOS D32 can't even enable WiFi with Meshtastic because the firmware fills up the available heap memory completely.
The original ESP32 (the one on most cheap boards you'll find on AliExpress) is now over 8 years old. Espressif has since released a whole family of newer chips: the C3, S3, C6 and others.
They're not just faster, they also have more usable RAM and fewer quirks. The ESP32-C3 in particular is a great pick for Meshtastic: it's cheap, small, modern, and the firmware runs without issues. In this guide I'll be using the ESP32-C3 Super Mini: a tiny, affordable board you can grab for around 2–3€ on AliExpress.
If you prefer ordering from a more reputable source with better documentation and no risk of a knockoff board - everything just works: take a look at SEEEDSTUDIO. The XIAO Series has the ESP32 S3 and the nRF52840 in a small form factor plus there is even a compatible LoRa SX1262 Radio Module in the same size available from them as a quite cheap bundle. Also - you wont have to flash the firmware yourself with Platformio, the Meshtastic Web Flasher fully supports the XIAO Board Kits:

Step 2 Choosing a LoRa Radio Module
As you might have read in my previous post,
there are quite a lot of bad low quality boards out there which might or might not work. The company that actually makes LoRa chips is called Semtech, they are the only ones producing the silicon. What you'll find on the market are modules built around their chips by third-party manufacturers like EBYTE, Waveshare, SEEEDSTUDIO, HopeRF etc.
There are a few different Semtech chip generations worth knowing about:
- SX1276/77/78: The older generation. Still works with Meshtastic and has massive community support, but higher power consumption and worse sensitivity compared to newer chips.
- SX1262: The current standard for DIY Meshtastic nodes. Lower power draw, better receiver sensitivity, and actively supported. Most community guides are written around this chip. (this too!)
- LR1110: Semtech's newer, more advanced chip. Besides LoRa it also has a built-in WiFi and GNSS scanner for passive geolocation without a real GPS module. Interesting for tracker builds, but overkill for a simple fixed node and harder to source as a bare module. (the SEEEDSTUDIO T1000E has it!)
Now here's where it gets important: Semtech only makes the chip. The module manufacturer has to add either a TCXO (Temperature Compensated Crystal Oscillator) or a cheap regular crystal for the clock source. This matters a lot in practice: a TCXO keeps the frequency stable across temperature changes, while a cheap crystal drifts and can cause your node to miss packets entirely. I learned this the hard way.
Also, choose a solid Antenna AND cable, I don't have the equipment to test them so please look out for other reviews. A good antenna can make the difference between not hearing anybody and seeing your first neighbour node.
Based on the region you live in, the Frequency and the allowed transmission power can be different - so please check local laws first. Here in Germany its 868MHz and 0.5W max (22dBm).
My recommendation: Go with an SX1262-based module from a reputable brand - Often used are:
- SEEEDSTUDIO Wio SX1262 (btw im not sponsored, thats just what I use and never had issues with)
- Ebyte SX1262
- Waveshare SX1262
Step 3 Flashing the Firmware
If you have a Compatible Board listed on the Web Flasher - great! If not: Also great! Let's flash it ourselves
1: Download and install (if not already) VSCode
2: Follow the official Meshtastic Guide to get everything set up: https://meshtastic.org/docs/development/firmware/build/ until you finished the step "Update the Build environment"
3: Now lets take a look at the Projects structure:
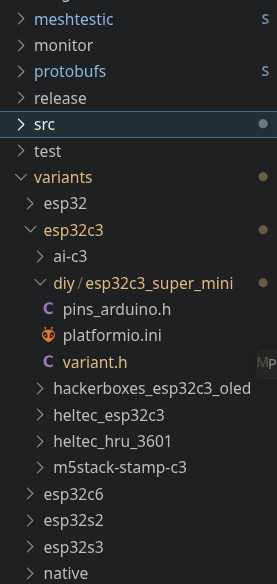
interesting for us is the "variants" folder. It contains the Pin configuration, flash options and more for each different Board Meshtastic supports grouped after the MCU. If you want to use a classic ESP32 there is the Folder variants/esp32/diy/v1. To modify pins etc yourself, clone the whole diy folder, rename it and alter the name in the platformio.ini to choose a project name: [env:meshtastic-diy-v1] to for example: [env:meshtastic-my-own-diy] If you don't want to modify anything, lets continue.
As I said before I use the ESP32 C3 Super mini so we will look at variants/esp32c3/diy/esp32c3_super_mini. This is available as one wonderful Meshtastic contributor submitted it :) In the variant.h you can see which Ports of the ESP32 board belong to which Pin on the LoRa Module etc.
Here is an overview which pin of the ESP32 Super mini has to be connected to which pin on the SX1262, sensors, GPS etc.
LoRa Module (SX1262)
| ESP32-C3 Pin | Module Pin | Notes |
|---|---|---|
| GPIO 10 | SCK | SPI Clock |
| GPIO 6 | MISO | SPI Data: Module → ESP32 |
| GPIO 7 | MOSI | SPI Data: ESP32 → Module |
| GPIO 8 | NSS / CS | Chip Select |
| GPIO 3 | DIO1 | Interrupt (incoming data) |
| GPIO 4 | BUSY | Module busy signal |
| GPIO 5 | RESET | Module reset |
| GPIO 2 | RXEN | RX antenna switch |
I2C (OLED, BME280, and other sensors, if used)
| ESP32-C3 Pin | Pin | |
|---|---|---|
| GPIO 1 | SDA | Data |
| GPIO 0 | SCL | Clock |
GPS module (if available)
| ESP32-C3 Pin | GPS Pin | |
|---|---|---|
| GPIO 20 | TX | ESP32 receives GPS data |
| GPIO 21 | RX | ESP32 sends to GPS |
Now you have to tell Platformio which board to use (pick project environment). Open the command palette (with CTRL+SHIFT+P) and choose "Platformio->Pick Project environment" and choose your Board:

It will take quite some time to download all libraries etc. Then go to the Platformio Icon on the left and choose build followed by upload:
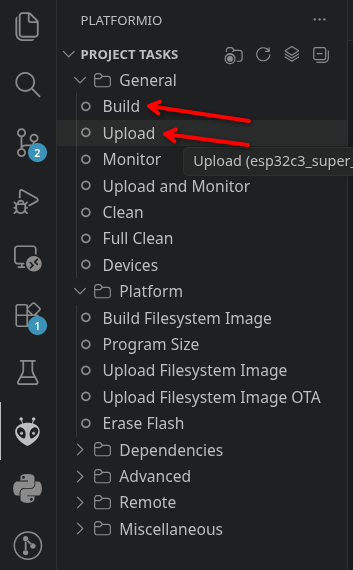
Your ESP32 should be ready to go now - click on "Monitor" and watch the Meshtastic Logs.
Step 4 Connecting Everything
Safety first: NEVER turn on the Radio Module WITHOUT an Antenna, it will fry your module ;)
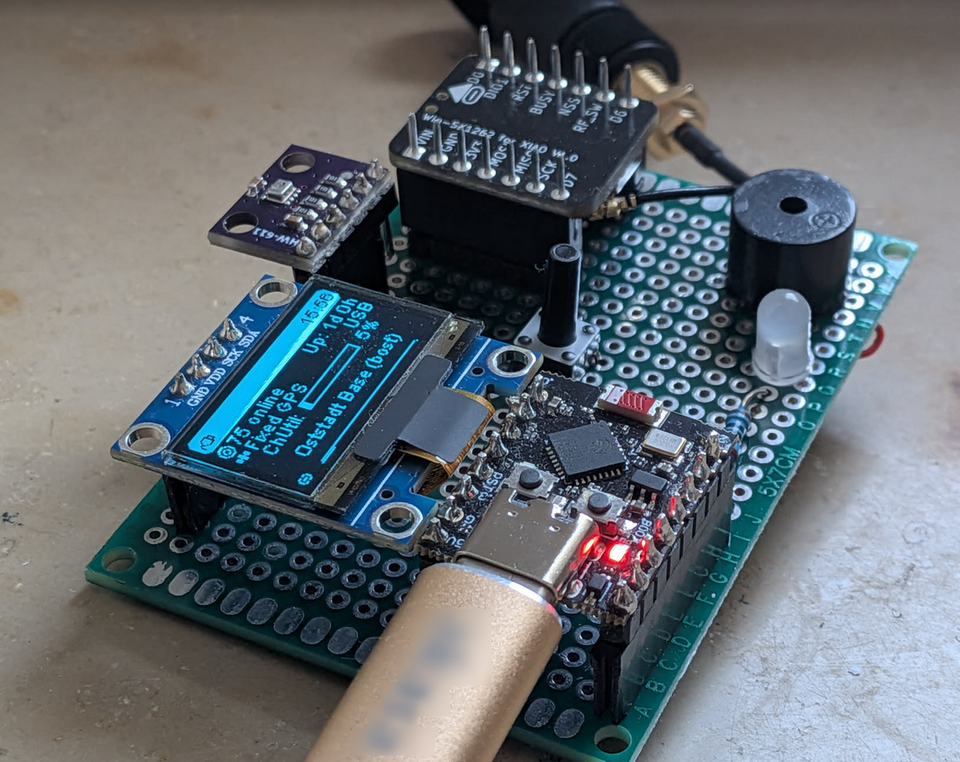
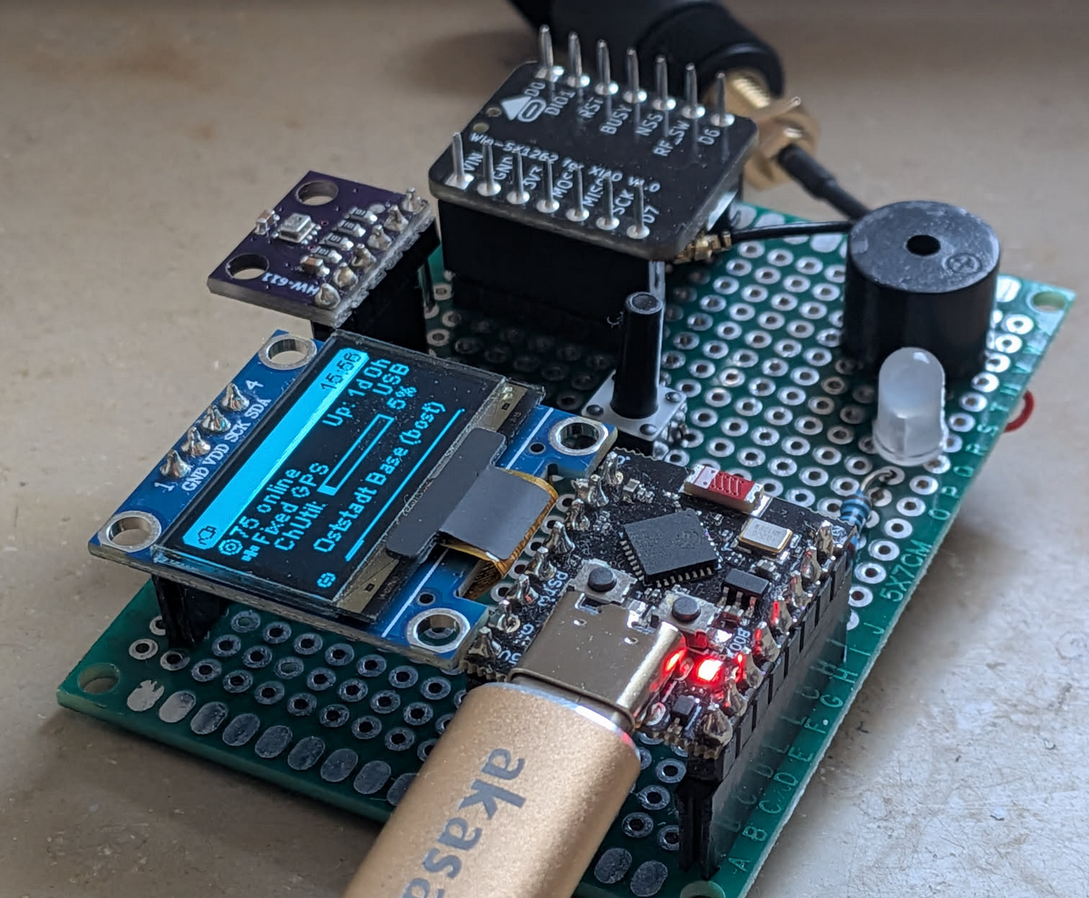
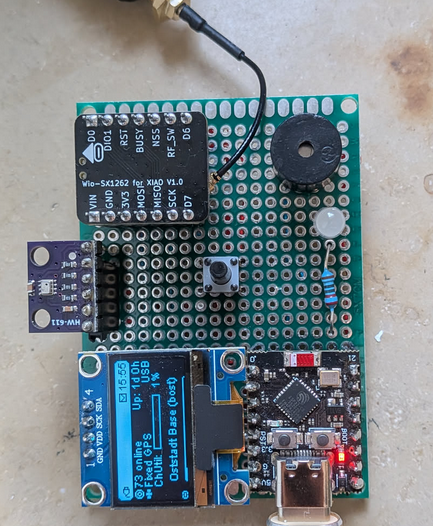
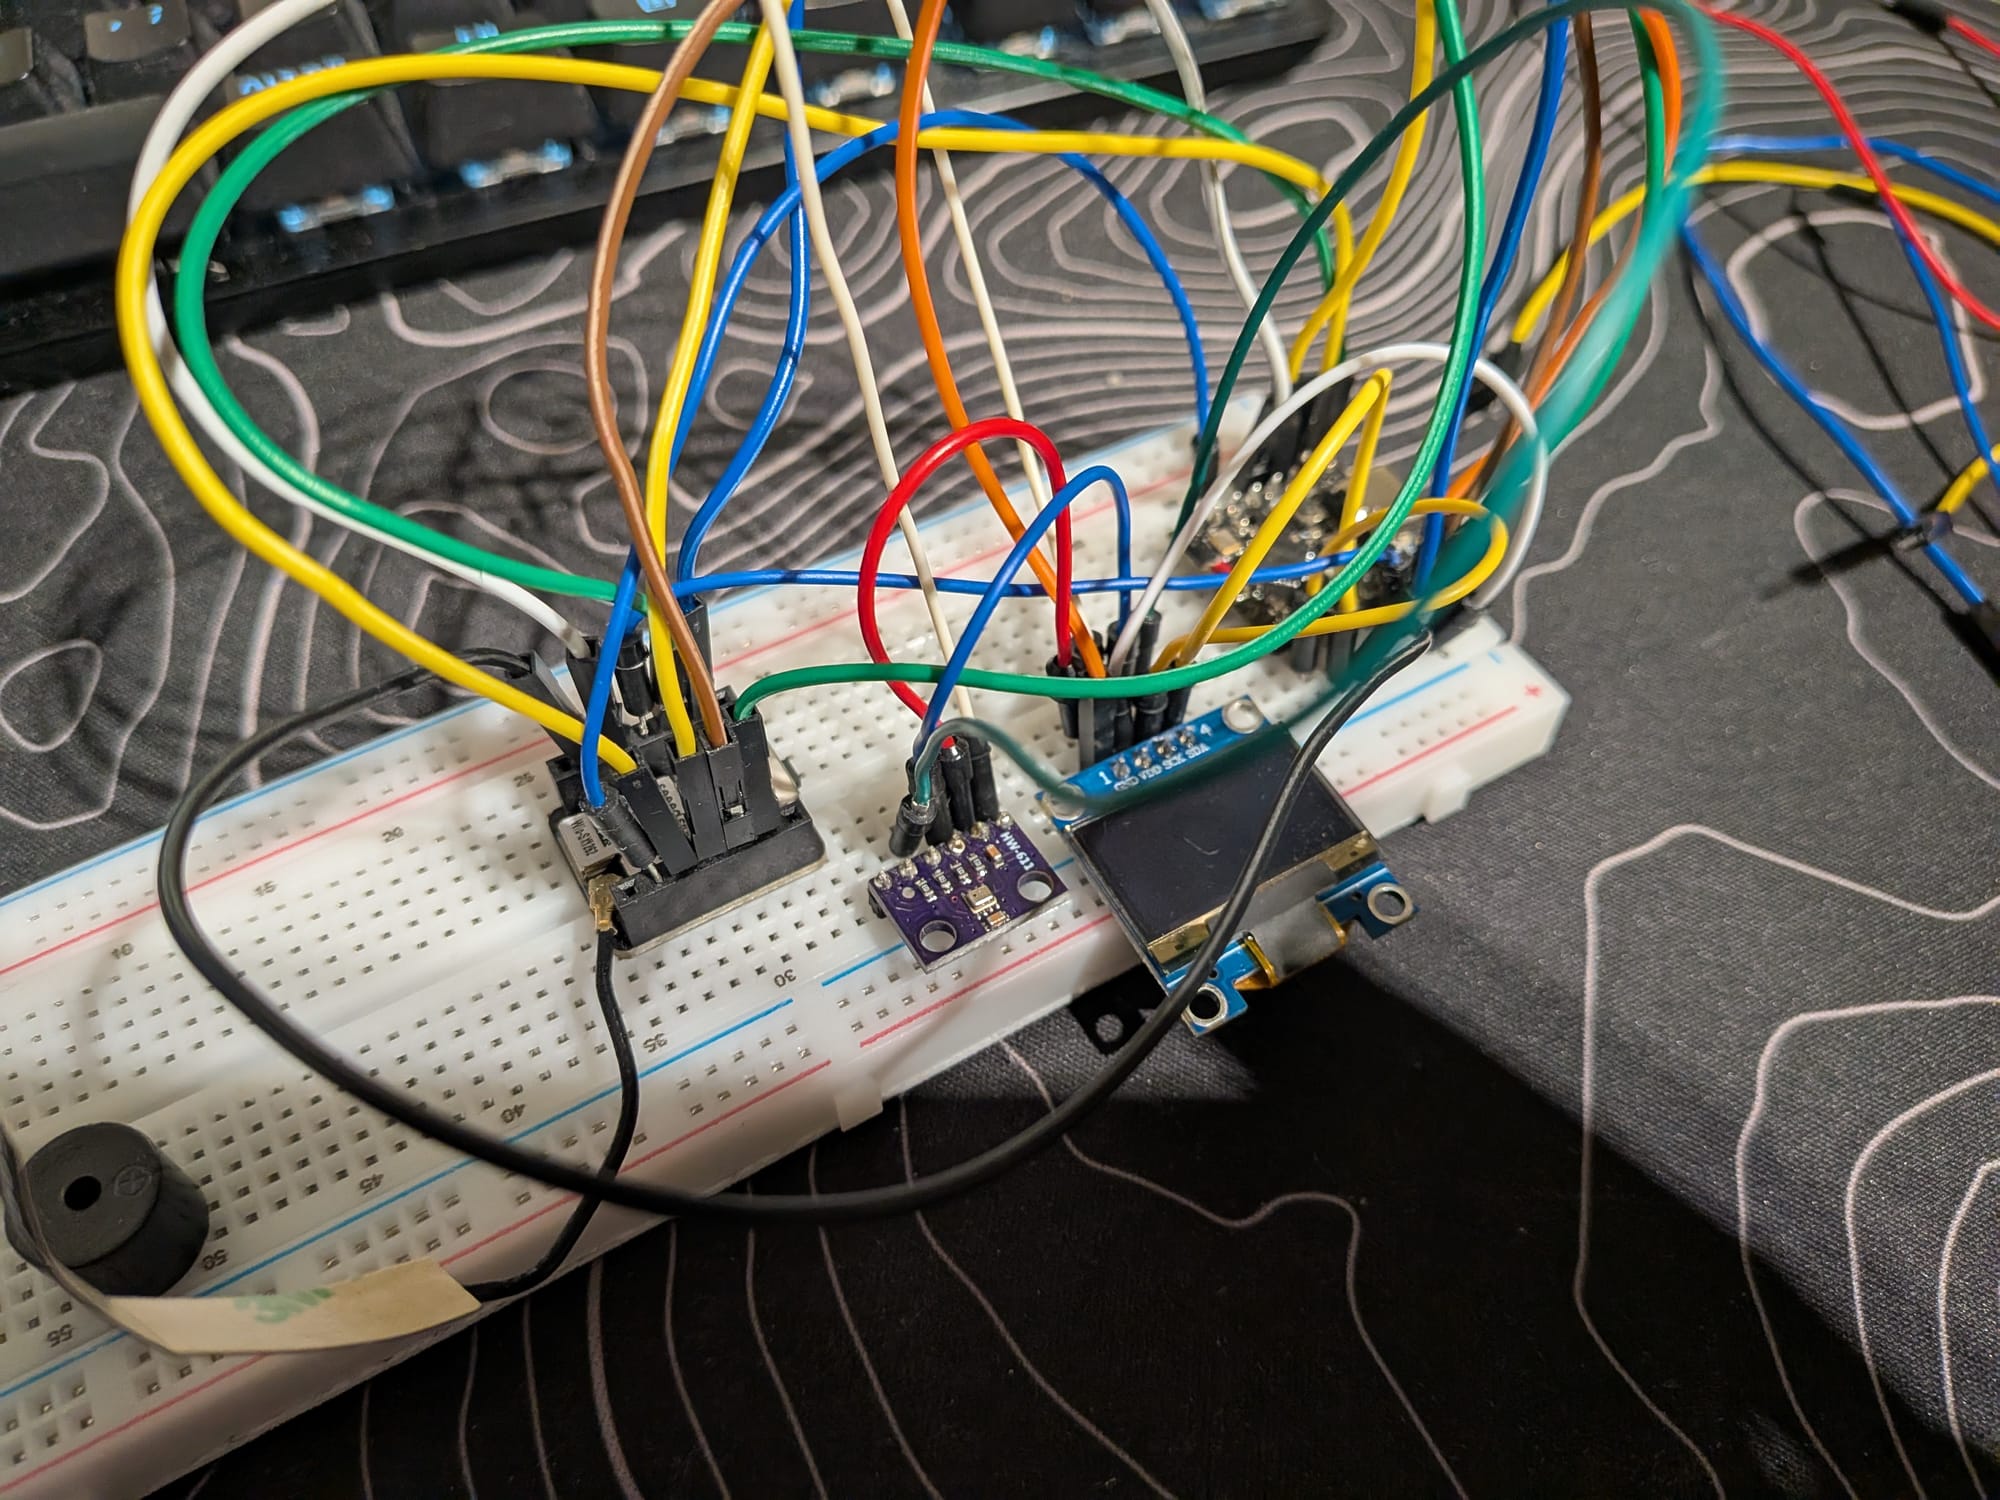
Ok, connecting everything on a Breadboard is just fine for testing but later on you might want to move to a Perfboard. You can add all kinds of supported sensors to your project: https://meshtastic.org/docs/configuration/module/telemetry/ or even a Buzzer, as i did in my Base station.
The SSD1306 OLED Display works just perfectly when also connected to the I2C Pins.

Step 5 Conclusion
Now you should have a working DIY Node build for possibly much cheaper and also much cooler than something pre built. If you encounter any problems, always look at the Serial Monitor to identify problems. Feel free to write a comment under this post if you have a problem or successfully built your own node 😄
Member discussion